It has been a good long while since I have posted on this blog. Time really got away from me. Last winter I cooked a LOT in my wood stove through the winter. Then Spring came with sooooo much rain that it was impossible to cook outside over wood, which I had planned to do and then blog it on here, along with a few scrumptious pics.
Then we went straight to the EXTREME heat of Summer and it was too hot and dry to light a fire of any kind. Fall was dry and windy, making fires dangerous. Plus, I had broken my leg in the early Summer and getting around was kind of hard.
Then Winter came again ..... ohhhh, did Winter ever come!! We had so much snow, and it seemed the cold would last forever ..... and at one point, we had the coldest temps we have ever had here in my lifetime. To keep warm, along with my regular firewood, I had to add in some wood that burned hot, but wasn't good for cooking on. I tried a time or two and burnt my dinner to a black crisp! No, I'm not going to show you pics of that, ha, ha.
Now we are back to Spring again. And this time it is the driest Spring I think I have ever seen, at least in a long time. The rains keep getting close to me, sometimes dancing all around me, but some how they keep missing me. I am having charcoal withdrawals, here. I am dying to BBQ something. Even got some new, delicious looking BBQ Sauces the other day to try. But we are under a very strict burn ban already, and have been for weeks. Wildfires seem to be raging all around and the smell of smoke in the air is almost constant. The winds are so high that quite a few trees are toppled down all over the area, and there is usually a thick haze in the air from the smoke. People all over are coughing and sneezing all day. And at night, there is a glowing orange haze over the moon from all the day's wildfire smoke. It's kind of pretty in a sad sort of way.
I don't want a gulley washer or a monsoon, and I don't want any hail, tornadoes or damaging lightening, but I DO want a good, long, soaking rain to moisten everything up so me and my smoker can have an all-day date! And when I do, I will tell you all about it on here.
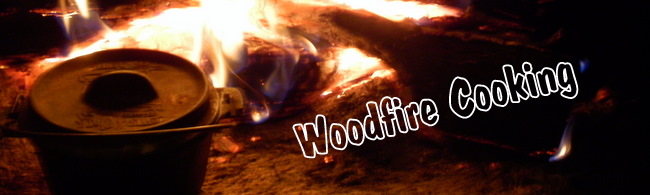
GIVE ME A FLICKER OF FLAME, AND I WILL COOK YOU THE TASTIEST OF MEALS!
April 20, 2011
March 5, 2010
TWICE BAKED SWEET POTATO
Now that you know how to bake a sweet potato in a wood fire, here is how you can make that hot, steamy baked sweet potato even better!
1 medium-sized sweet potato
1/4 cup crushed pineapple - do not drain
2 T. packed brown sugar
1 tsp. melted butter
1 T. chopped walnuts
2 pinches cinnamon
small marshmallows
shortening - small amount
3-cup mini Dutch Oven (3/4 quart)
{Keep in mind, ALL of these ingredients can be varied to your personal taste.}
Remove peel from baked sweet potato. In a medium-sized bowl, mash sweet potato with a fork, leaving it slightly lumpy.
Measure out 1 rounded cup of the mashed sweet potato into another bowl. (refrigerate remaining sweet potato, if any, for a later use).
Add to the measured, mashed sweet potato, the pineapple, brown sugar, butter, walnuts, and cinnamon.
Stir together until thoroughly blended.
Lightly grease the inside of your mini Dutch Oven. Press all of the sweet potato mixture into the mini Dutch Oven. Place lid on top.
Wood Stove: Inside your wood stove, push the coals back away from one corner. Set the filled Dutch Oven in that corner. Coals can be close to it, but not touching. Bake, turning the oven around occasionally, until the sweet potato mixture is thoroughly hot through.
Remove lid (lid will be extremely hot!) and top the sweet potato mixture with mini marshmallows. Let bake a little bit longer, uncovered, until the marshmallows puff up and are golden brown. Serve while hot.
Camp Fire: With your camp or back packing shovel, rake out a clear area in the middle of the coals, large enough to set the filled Dutch Oven. Set your Dutch Oven in that cleared out space. Make sure coals are as close to the oven as possible, without touching the oven. Shovel a few coals into the indented lid of the Dutch Oven.
Let cook until the sweet potatoes are thoroughly hot through. Carefully scrape the coals off of the lid with your shovel and remove lid (use heat safe mitts or gloves!). While the Dutch Oven is still surrounded by coals, top the sweet potato mixture with the mini marshmallows. Let it continue to cook, uncovered, until the marshmallows are puffed and golden brown. Serve hot!
February 27, 2010
Baked Sweet or White Potato
1 large sweet potato or white baking potato (or any size you desire)
1 sheet of heavy duty aluminum foil
Butter and other toppings of your choice
Thoroughly scrub potato clean. Cut out any bad spots (Be careful. Uncooked sweet potatoes are very hard and your knife will slip easily). Do NOT dry your potato.
Place your very damp potato on your sheet of foil, making sure the shiny side of the foil is UP.
Completely wrap your potato up in the foil, folding one end of the foil over one side of the potato, and the other end over the other side.
Method 1: Place thoroughly wrapped potato inside your wood stove, close to but not in or touching the coals. Keep away from actual flames.
Method 2: At the edge of your campfire, using your camp shovel, carefully scratch and scoot out an opening in the center of a bed of glowing coals. Place your wrapped potato in the cleared opening. Make sure the coals surround the potato, but do not touch it.
Periodically turn your potato while it is cooking so it will cook evenly. Be patient and let your potato slow cook for 1 to 3 hours ...... cooking time depends on the size of the potato and the temperature of the fire/coals. Do NOT open up the foil before your potato has finished cooking. This will cause it to dry out and cook unevenly.
Test to see if your potato is done by gently squeezing it or pressing on it with your small fire shovel. {Be extra careful as the potato and the foil can get extremely hot! Use of a heat safe protective mitt is strongly suggested. Do not stick your bare hand in the fire, nor grab hold of the foil with it!} When your potato is done, you will be able to feel the "give" in it all the way to the center (Do not press it all the way to the center and smash it, you will simply be able to feel that it is soft all the way through.).
When potato is completely cooked, remove from fire with tongs or your fire shovel. Open the foil VERY CAREFULLY keeping in mind that hot steam will probably come pouring out. This steam will burn very fast and possibly over a large area of skin. I like to stand way back and use my hot dog roasting stick to open mine. Split potato open with a knife. If using butter, add it immediately so it will melt in. Add any other toppings you enjoy on your baked sweet or white potato and ENJOY!!!
February 18, 2010
White Bread
1 large egg
1/2 cup milk, scalded
Whisk egg thoroughly. Add milk and whisk until well blended. SET ASIDE.
---------------------------------------------------------------------------
2 T. of above egg mixture
3 T. very warm water
1 tsp vegetable oil
1/4 tsp. salt
1 tsp. granulated sugar
1 cup white flour
1/2 tsp rapid rise yeast
melted butter
a little more vegetable oil
Into a sturdy mixing bowl place the egg mixture, warm water, oil, salt, and sugar. Whisk until well blended; set aside.
In another bowl, stir together approximately 2/3 of the flour and the yeast. Keep the rest of the flour handy.
Add a sprinkle of the flour/yeast mixture to the liquid mixture; whisk until smooth.
Add a little more of the flour/yeast mixture to the liquid and whisk until smooth. (This raises the gluten for a better textured bread).
Add the remaining flour/yeast mixture and mix in well.

Since this is such a small loaf of bread, I just knead it right in the sturdy bowl. Begin kneading the bread, adding in more of the remaining flour, a little at a time. Add the flour in small amounts as you knead, until the dough is no longer sticky. (It may take all of the remaining flour, it may not take quite all of it, and it might take just a little more. It all depends on the moisture content of the flour) Continue to knead the dough for a few more minutes, until it is smooth and elastic.
Take the dough ball out of the bowl a moment while you add a few drops of vegetable oil to the bottom of the bowl. Slightly flatten out the ball of dough, place it in the bottom of the bowl, and move it around a little to spread the oil out in the bottom of the bowl. Turn the dough ball over so that the oily side is up. Cover with a towel, set in a warm place free of all drafts and let rise for about 45 to 50 minutes, until doubled or so in bulk.
While it is rising, coat the bottom and sides of a 3-cup Lewis & Clark Dutch oven with vegetable oil. After the dough has finished rising, punch it down. Place it in the Dutch oven and set in a warm place to rise until again doubled in bulk. It will not take quite as long this time, about 30 to 40 minutes. DO NOT put the lid on the Dutch oven.
Once the dough has completed rising, carefully place the Dutch oven inside your wood stove. Take care not to touch or jostle the dough or it will fall. Do not let the coals or fire touch the Dutch oven or the dough.
Let bake until golden brown and the bread has a "hollow" sound when tapped with your fingernail. Turn pot around occasionally while cooking. Cooking time will greatly vary, depending upon the temperature of the fire, but will generally take between 20 and 25 minutes to bake.
When done, rub the end of a stick of butter around over the top of the loaf. Serve hot with more butter!
February 10, 2010
INTRODUCTION
For as far back as I can remember, I have enjoyed tent-style camping and cooking outdoors over an open fire. There seems to be a magical aura about it that is unmistakably warm and comforting. The food tastes remarkably better than anything ever cooked on an electric or gas burner. Watching the mesmerizing glow of the fire as you cook will relax you far better than any medication will (my opinion). And the intoxicating aroma of the sizzling food, mingled with the fragrance of the drifting wood smoke simply can't be beat!
As my children were growing up, we went camping often. And we always did our cooking over a wood fire. Even when we had a travel trailer with a full-size stove, I still preferred cooking outdoors over a wood fire. The camping experience just seemed to be lacking something if we didn't. Let me tell you, there is just no substitute for a country breakfast of bacon, farm fresh eggs, and fried potatoes cooked over hickory wood in the good old outdoors!
About ten years ago, when my brood of kids were all still home, we had a major ice storm come through. We were without power for 10 plus days. With a total electric kitchen and 5 hungry kids, that presented a problem, so they initially thought. It was soon discovered that Mom could cook some pretty good meals in and on that old Buck stove we were heating our house with. They had so much fun coming up with ideas of what they wanted me to try to cook next in/on the wood stove, that they nearly forgot that the power being off was an inconvenience. But I will warn you, if you try to cook bacon in quantity on a cookie sheet rested on top of the logs, MAKE SURE IT DOESN'T TIP! That fire was a little more than we cared to deal with, but all ended deliciously well and it made for a great memory.
We have had a couple more ice storms since then, temporarily knocking the power out, and that old wood stove continually kept us well fed. Now the kids are all grown and moved out on there own. But I am still here, warming myself by that old Buck stove as I type.
A couple of years ago I purchased the cutest little 3-cup Dutch oven from Cabela's. I had intended to use it camping, but one day this winter I decided to see how it worked in the corner of my wood stove. I thought, with just me here, there is no point in wasting money on electricity if a fire is already going in the wood stove and there is just me to cook for. The first mini pot of stew turned out terrificly! And I have since cooked an array of delicious foods in it. For Christmas I received another mini Dutch oven. This one came from Lewis & Clark, as Cabela's no longer carries them. With the tiny little legs on them they stack perfectly, giving me the ability to cook full, two serving meals in just the corner of my wood stove, all while it is heating my house.
So during this extra cold, hard winter, I have seized the opportunity to unleash my cooking creativity to create tasty recipes cooked over/in a wood fire. It has been a most rewarding experience. The electric stove in the kitchen has forgotten what I look like, but I have been pleasantly surprised at the quality of the food baked inside that Buck stove. Gosh, have I ever been missing out!
As our weather patterns change and worsen, and the threat of war activity on our ground grows, it is now more important than ever to educate ourselves with alternative cooking methods. Not only daily, but especially in the midst of a crisis, a healthy, hearty meal is a must to provide the mind and body with the strength to deal with the tasks at hand. So now I will begin sharing with you the recipes I create in and on my wood stove this winter, and over a crackling outdoor fire this summer. I will also include 'recipes' on how to build those fires and tips on the best cookware for wood fire cooking. Be sure and check back often for updates and new recipes. And if you have any suggestions, questions or comments, feel free to add them to the comments right here, or email me at: tentfire@hotmail.com.
Now, let's get cooking!
Subscribe to:
Posts (Atom)